CCP4i diffraction image display (idiffdisp)
From Media Wiki
Contents |
[edit] Introduction
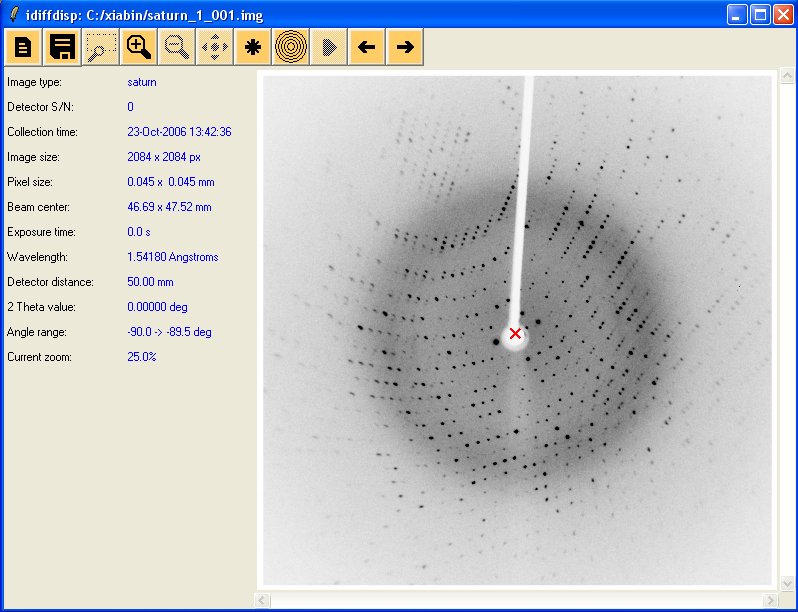
idiffdisp is a tcl-tk application that displays diffraction images, their standard header information and some useful calculations. It relies on the tcl module of the Diffraction Image library. The window of idiffdisp is divided in 3 parts: The toolbar, the information panel on the left, originally containing the header information and the zoom level and the image on the right. At the bottom of the information panel is a small status bar that show which pixel the mouse is on and what is the resolution at that particular pixel.
[edit] The Toolbar
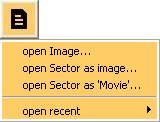 |
Open menu: Let you open a single image, a maximal image from a sector or make a movie sequence out of a sector. Also give you the possibility to reopen recently opened image/sectors. |
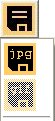 |
Save menu: Let you save a single image or a maximal image to jpeg format or save a movie sequence as a gif file. This require image magick convert program to be installed. |
| Zoom Box: Let you specify which part of the image you want to zoom on. In Movie mode this will apply the zoom on all frames. On Linux use the mouse wheel to adjust zoom level. On windows or if you do not have have a wheel use keyboard keys + and - to adjust the zoom level. | |
| Zoom in/out: Change the scale of the whole image from a range of zoom levels (currently 10%, 25%, 33%, 50%, 100%, 200%). | |
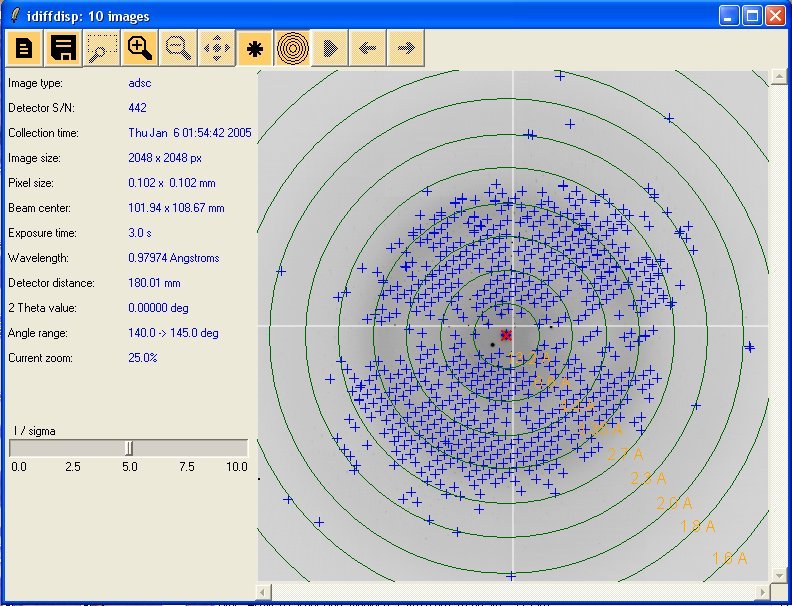
| Find Spots: Show/Clear spots found on the image, the original I/sigma value is 2.0 but as soon as this option is on. A slider will appear on the left panel to let you adjust the value as shown below with the maximal image screenshot. | |
| Resolution Circles: Show/clear resolution circles calculated for the image. This relies on the beam centre from the image header, if it is wrong, so will be the circles position. (see below for a screenshot) | |
| Play: Play the movie sequence, only available in movie mode. | |
| Profile: Press once on the button to have activate the profile mode. Press a second time to turn the mode off. Click here for more details | |
| Previous/Next: In image mode, these will open the previous/next image in directory. In movie sequence mode this will display the previous/next frame. | |
| Configure: Opens a configuration windows in which you can set your choice of colours for various aspects on the interface (for example: resolution circles, spots, ...). | |
| Help: Opens a web browser showing the help file. |
[edit] Images sector as a Maximum Image
In this mode, all image are "collated" into a maximum image, this means that what you see is an image where each pixel was the maximum value amongs all the image of the sector. This helps to see the lattice appearing. On the image below you also can see the spots finding tool and the resolution circles at work.
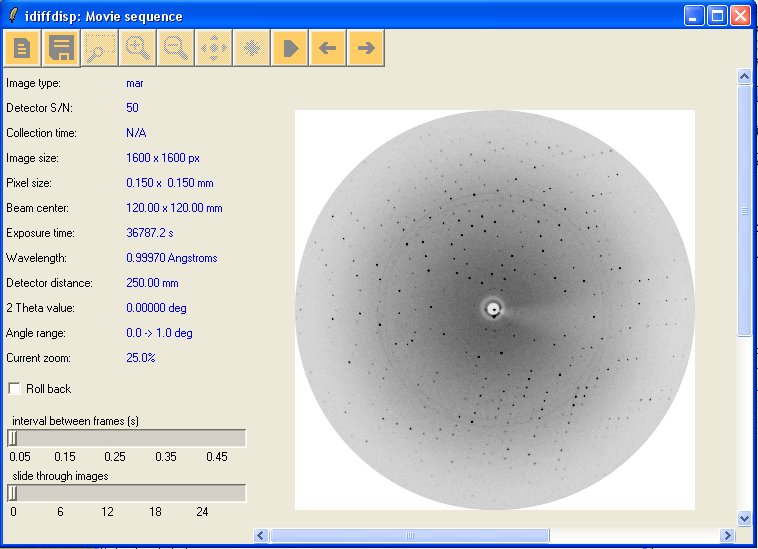
[edit] Images sector as Movies
This mode will let you display a sequence of images as an animation. When being in this mode, more controls will appear on the left panel: two sliders and a checkbox. The first one let you specified the inter frame delay and the second let you slide through your frames by hand. The checkbox let you choose if you want the movie to rollback or not. In this mode, if you have the convert the save menu will give you the opportunity to save the animation as an animated gif. Click here for an example (note your browser might loop-playing it). Below is a screenshot illustrating the interface in movie mode.
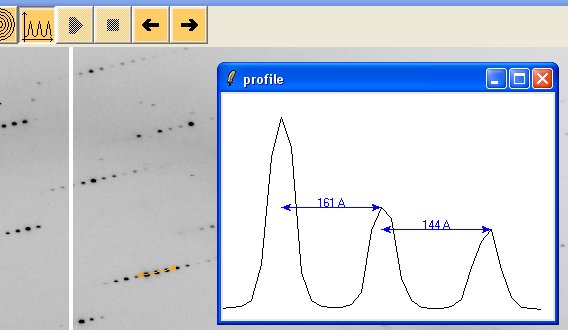
[edit] The profile Tool
Once you pressed down the profile button. You then draw a line (once click for the first point and then a second click to choose the end point). Once the line is drawn, a profile windows showing the intensity profile along the line will pop up. It will also attempt to show you the distance between peaks (between intensity peaks, not gaussian profile of the peak).
Below is a screenshot illustrating this process.