Contents
IntroductionThe Renderer
Screenshots
Screenshot and Movie Preferences
PostScript
 |
CCP4 Molecular Graphics Documentation | |
| Presentation Graphics |
| Documentation Contents | On-line Documentation | Tutorials | CCP4mg Home |
CCP4mg will output
The Render option on the File menu opens an interface
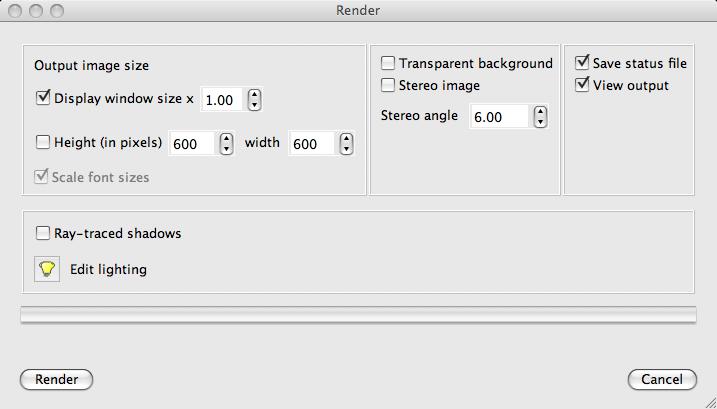
When you click Render it may take a short while to create an image. You will be asked to enter the name of an image file (note that you can set the format of the output file) and the image which will be displayed in a viewer. The program status is also saved to a file with the same name as the output image file with the extension '.pkl'.
The two ways to see stereo images:
For cross-eye stereo cross your eyes so the two images appear on the top of each other (try watching a finger or pen move towards you from the screen to 1015 cm from your eyes).
For wall-eye stereo (aka. divergent or wide-eye stereo) look through the image focusing on a distant point (try putting a sheet of paper from your nose to the screen).
Most people seem to prefer wall-eye stereo and most journals request wall-eye stereo pictures.
Screenshot on the File menu will output exactly the current scene with similar options to the Renderer. The quality of picture is not as good as the Renderer.
The screenshot preferences are in the Images and movies folder of the Preferences window (accessed from the Tools menu).
These Preferences apply to both saving the screen image as a screenshot and
saving images when making a movie.
Create image offscreen(offscreen buffer).The image can either be copied from the computer screen (note for computer nerds: it's actually using the backbuffer) or the image can be recreated in an offscreen buffer before it is saved to file. The disadvantages of simply taking the image from the the screen are
Using the offscreen buffer solves these two problems but may be noticeably slower; but it is the recommended option.
Smooth edges (anti-alias) output Smoothing the edges of ribbons, spheres and cylinders, i.e. anti-aliasing, is generally recommended to avoid them having a jagged appearance when viewed closely.
It is possible that for some combinations of hardware and operating system the offscreen buffer and/or anti-aliasing will not work and may need to be switched off. We would be interested to hear if you notice problems but may not be able to offer any better advice than: try the various alternatives and use the one that works.
From version 1.1 CCP4mg will output both line drawings and solid objects such as ribbons or spheres to a Postscript file. The benefit of Postscript is that it specifies the coordinates of lines and polygons rather than the colours of pixels and so the resolution is determined only by the limits of the output device. Postscript format is mostly used for displaying line drawings such as electron density maps or packing diagrams or simple blank and white images. It may be useful in Postscript output to have bonds drawn as dashed lines. To make Bonds, Fat bonds or Thin bonds dashed click on the model display object icon menu and select Custom drawing style..; this opens a Preferences window in which you can set Dashed bonds on and set Dash length for dashed bonds. Postscript images are always created with white background. Beware that writing Postscript files can be slow.